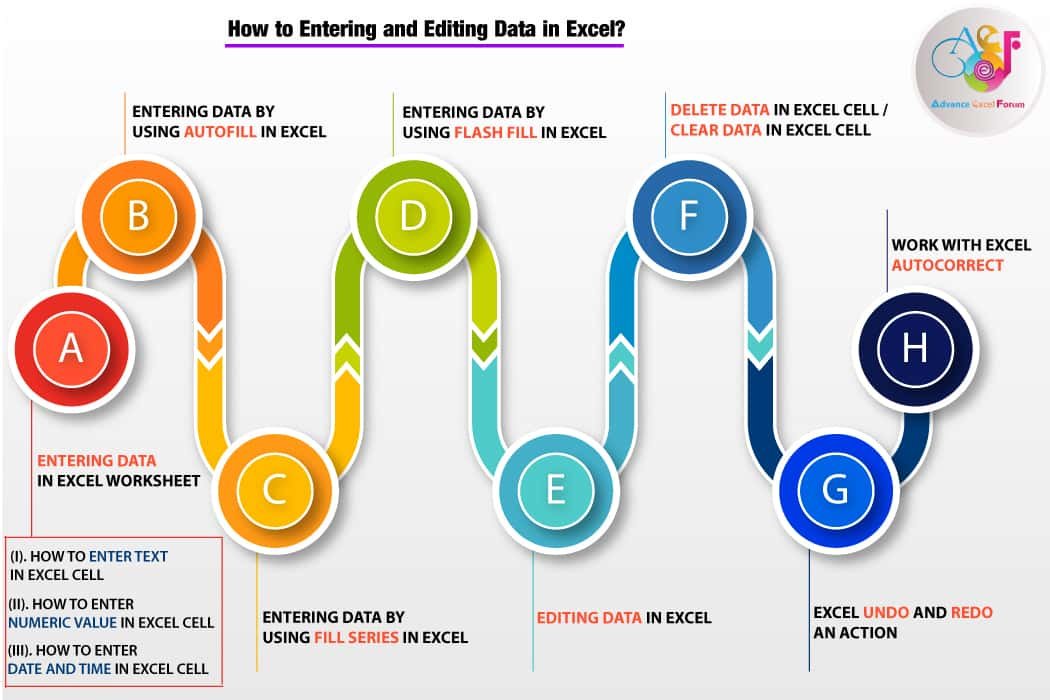
It is very important to know every Excel users how to entering and editing data in Excel?
TABLE OF CONTENTS:
Toggle(A) ENTERING DATA IN EXCEL WORKSHEET
There are three types of data that can be entered into a cell: text, number (numeric value), and date and time.
To move to the next column after entering data, just press the Tab Key. To move to the previous column after entering data, simply press Shift+Tab.
I. HOW TO ENTER TEXT IN EXCEL CELL
(01) Text is also known as a string. Text can consist of a combination of letters, numbers, and some symbols. Text data are left-aligned in a cell. We can’t use text data directly in a formula, but we can use a text in a Text function within double quotation mark, for example, =50&” “&”Meter” or =CONCATENATE(50,” “, “Meter”). Both functions return a result: 50 Meter.
If text data consists of more characters than fit within the column’s current width, the extra characters spill over and are displayed in blank cells in columns on the right. (If these cells are not blank, Excel cuts off the display of any characters that don’t fit within the cell borders until we widen its column.)
(02) LINE BREAK IN EXCEL:
If we create a paragraph (line break) in a cell, press and hold down Alt+Enter.

■ Note: We had detail explained on Excel shortcuts in separate two tutorials, suggested you read these tutorials:
80+ Excel Shortcuts with ALT Key || Best Hotkey of Keyboard Shortcuts
90+ Best Excel CTRL Shortcuts | Useful Keyboard Shortcuts |
(03) NUMBER TO TEXT IN EXCEL:
If we want to enter a number (numeric value) as text, first type an apostrophe and then the number, such as ‘2020.
■ Note: We can change the text format with an apostrophe to number format in the following methods:
(i) Step 1: Select the range of cells ➪ Press Alt+D+E or Alt+A+E which will open the Convert Text to Columns Wizard – Step 1 of 3.
By default, Excel selects the ‘Delimited’ radio button (if not, then select this radio) ➪ Press Enter or click Next.

(ii) Step 2: Uncheck all the Delimeters ➪ Press Enter or click Next.

(iii) Step3: Click the Text radio button under Column data format (or, press Alt+T which will select the Text radio button) ➪ Press Enter or click Finish.

As a result, the range with numbers is converted to text.

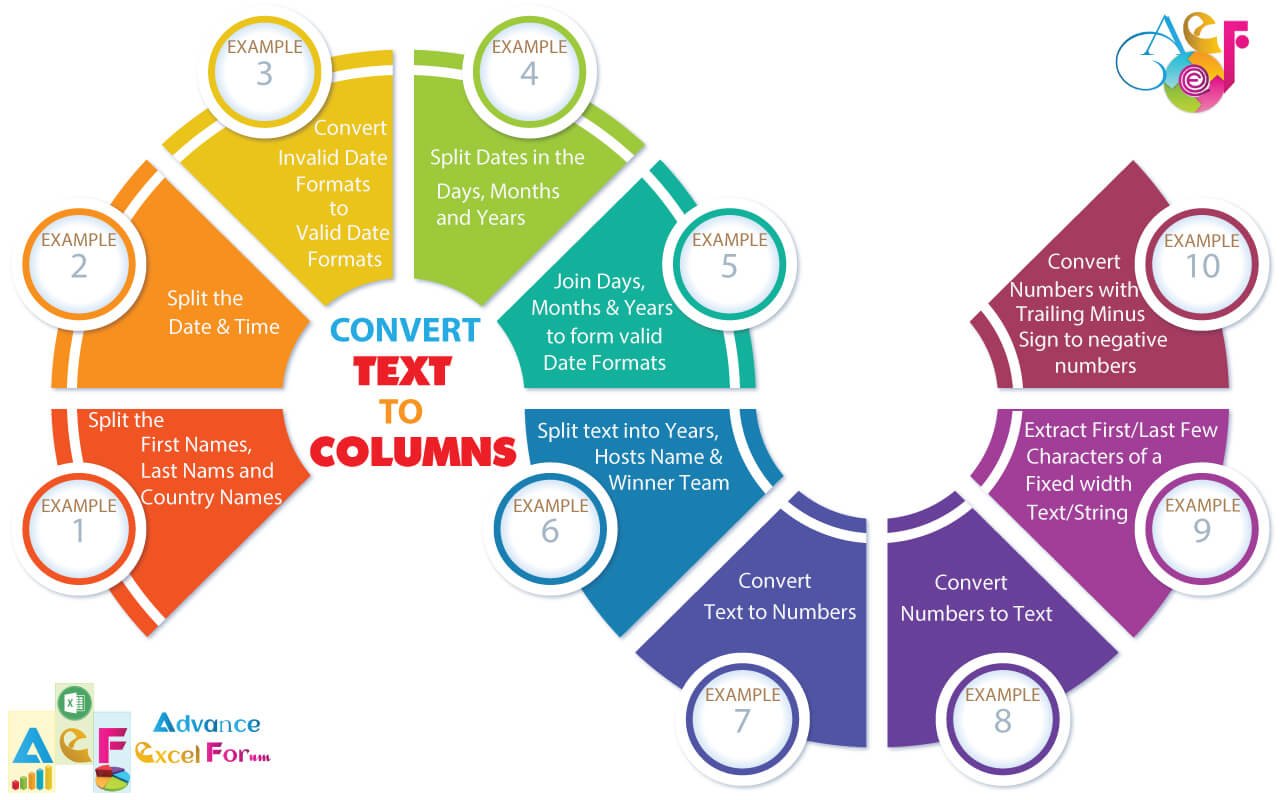
We had detail explained on Convert Text to Columns in a separate tutorial, suggested you read this tutorial: 10 Examples of Text to Columns || How to Split Cells/Columns in Excel
(04) GENERAL TO TEXT FORMAT IN EXCEL:
We can change the cell format from General to Text either in 4 ways:
(i) Select the range ➪ Ctrl+1 which will open the Format Cells dialog box ➪ Number Tab ➪ Select Text.

(ii) Select the range ➪ Press Alt+H+N (sequentially press Alt, H, N) ➪ Type Text or choose Text from the drop-down list.

(iii) Select the range ➪ Home tab ➪ Alignment Group ➪ Click on Command dialog box launcher ➪ Format Cells ➪ Number Tab ➪ Text

(iv) Select the range ➪ Home tab ➪ Number Group ➪ Click on Command dialog box launcher ➪ Format Cells ➪ Number Tab ➪ Text

We had detail explained on How to change date format in Excel in a separate tutorial, suggested you read this tutorial: BEST 05 WAYS: HOW TO CHANGE DATE FORMAT IN EXCEL?
(05) PICK TEXT FROM DROP-DOWN LIST:
(i) Using Excel Shortcut: In a column, if the previous cells are filled with data we can capture them with the Alt+⬇ (Down arrow) drop-down list. We can select any of them by down arrow (⬇) and finally press Enter.

(ii) Using Right-click: Right-click on a blank cell in a column with existing values and then click ‘Pick From Drop-down List’ from the shortcut menu.

■ Note: Please keep in mind that data should be filled in each cell of a column, which means there should be no blank cell in between; the otherwise drop-down list could not fetch the data and keep blank.

(06) ENTERING DATA BY AUTOCOMPLETE LIST:
Excel will give lots of ways to enter data quickly. Excel AutoComplete feature helps us enter data in a cell is to recognize whether the first few characters of the text that we’re typing matches text from another cell in the same column; if the text matches, Excel offers to complete the rest of that text.
Press the Tab key or Enter to accept the AutoComplete value.

■ Note: AutoComplete works only if the text is entering is similar to the text already in the same column.
We can turn Autocomplete on and off by selecting File ➪ Options ➪Advanced ➪ Editing options ➪ Check or uncheck the Enable AutoComplete for cell values. If checked, AutoComplete turns on; if unchecked AutoComplete turn off.
II. HOW TO ENTER NUMERIC VALUE IN EXCEL CELL
Numeric values are numbers that represent a quantity or a measurable amount. Excel usually distinguishes between text and numeric data.
If any other character or even space is included in the cell, Excel treats the data as text. Only cells that contain numeric values can be used in a formula. Numeric data is right-aligned in the cell.
If the numeric values consist of more characters than fit within the column’s current width, Excel displays a string of number signs across the cell (######), telling us to widen the column. (In some cases, such as decimal numbers, Excel truncates the decimal places shown in the cell instead of displaying the number-sign overflow indicators.)
Step to Start:
- Click the cell to enter numbers.
- Type a numerical value.
- Press Enter key.
Note: We do not need to type the last 0 after decimal such as 525.50. Excel by default remove it such as 525.5. Excel only considers the trailing 0 depending on the decimal place formatting.
(01) HOW TO APPLY EXCEL NUMBER FORMAT
The default number format is General, which displays values as we originally enter them. The General number format does not align the decimal points in a column or include symbols, such as dollar signs, percent signs, or commas.
Excel offers 12 different number categories, or styles, to choose from.
(i) First, we select cell(s), entire rows, entire columns, or the entire worksheet. Then we apply Excel number format any of the following methods:
➢ Method 1: Using the Ribbon
Go to the Home tab ➪ Number ➪ Choose Number Format from the drop-down list ➪ Click a number category ➪ Press Enter or click OK.
If we don’t see the category we want on this list, click More Number Formats, which will open the Number tab in the Format Cells dialog box ➪ Click any of 12 number Categories ➪ Click OK.

➢ Method 2: Using the Ribbon Shortcut
Press Alt+H+N (sequentially press Alt, H, N) which will activate the Number Format and by default General is selected ➪ press Alt+⬇ (down arrow) to open the Number gallery ➪ select the desired format and press Enter.

➢ Method 3: Using the Format Cells dialog box launcher in the Number Group
Select the cells that we want to format ➪ Click the Home tab ➪ In the Number group, click the Format Cells dialog box launcher. The Format Cells dialog box will be displayed.

➢ Method 4: Using the Excel Shortcut
Equivalently, Select the cells that we want to format ➪ press Ctrl+1 which will open the Number tab in the Format Cells dialog box ➪ Click any of the 12 number Categories ➪ Click OK or press Enter.
Table: Number Formats A number with or without the 1,000 separators (e.g., a comma) and with any number of decimal places. Negative numbers can be displayed in parentheses and/or red. Thus, the Number category has 3 options that we can control: • The number of decimal places to display • Whether to use a thousand separator • How to display negative numbers A number as a decimal fraction followed by a whole number exponent of 10; for example, the number 300000 would appear as 3.00E+05. The exponent, +05 in the example, is the number of places the decimal point is moved to the left. (E is defined for Exponential Notation). Format Style Display Excel Shortcut General A number as it was originally entered. Numbers are shown as integers (e.g., 12345), decimal fractions (e.g., 1234.5), or in scientific notation (e.g., 1.23E+10) if the number exceeds 11 digits. Ctrl+Shift+~ (tilde) ➪ Applies the general number format Number Ctrl+Shift+! ➪ Applies the comma format with two decimal places Currency A number with the 1,000 separators and an optional dollar sign (which is placed immediately to the left of the number). Negative values are preceded by a minus sign or are displayed in parentheses or in red. Two decimal places display by default. Ctrl+Shift+$ ➪ Applies the currency format with two decimal places Accounting
Number FormatA number that contains the $ on the left side of the cell and formats the value with a comma for every three digits on the left side of the decimal point and displays two digits to the right of the decimal point. Negative values are displayed in parentheses, and zero values display as hyphens. Comma Style A number is formatted with a comma for every three digits on the left side of the decimal point and displays two digits to the right of the decimal point.
Used in conjunction with accounting Number Format to align commas and decimal places. Date The date in different ways, such as Long Date (August 15, 2020) or Short Date (15/08/20 or 15-Aug-20). Ctrl+Shift+# ➪ Applies the date format (dd-mmm-yy, i.e., 15-Aug-20). Time The time in different formats, such as 10:50 PM or 22:50 (military time). Ctrl+Shift+@ ➪ Applies the time format (hour:minute a.m/p.m) Percent Style The value would be multiplied by 100 (for display purpose), with the percent symbol. The default number of decimal places is zero if we click percent Style in the Number group or two decimal places if we use the Format Cells dialog box. However, we should typically increase the number of decimal points to show greater accuracy. Ctrl+Shift+% ➪ Applies the percent format with no decimal places Fraction A number as a fraction; use when no exact decimal equivalent exists. A fraction is entered into a cell as a formula such as =1/3. If the cell is not formatted as a fraction, the formula results to display. Scientific Text The data left-aligned; is useful for numerical values that have leading zeros and should be treated as text, such as postal codes or phone numbers. Apply text format before typing a leading zero so that the zero displays in the cell. Special Contains an additional number of formats specific to our country. In the United States, there are four (Zip Code, Zip Code+4, Phone Number, and Social Security Number); in Canada, there are two (Phone Number and Social Insurance Number); in most other countries, there is none. Custom Enables us to define custom number formats that are not included in any of the other categories.
The Number group on the Ribbon also displays three icons for applying Accounting Number Format, Percent Style, and Comma Style numbering formats.

(i) Accounting Number Format in Excel: The Accounting option has a drop-down list from which we can select different international currency symbols, such as English pounds or euros.

(ii) Percent Style: This option adds a percent sign and no decimal points.
(iii) Comma Style: The Comma option adds two decimal places and a comma between the thousands. It does not include a dollar sign.
(02) INCREASE AND DECREASE DECIMAL PLACES
Excel displays two decimal places by default. To remove digits to the right of the decimal point, click the cell or select a range of cells containing decimal values ➪ Home ➪ Number ➪ Decrease Decimal. To add decimal digits, click the Increase Decimal button. Each click adds or removes a number to the far right of the decimal point and rounds the value in the cell.
■ Note: Excel numbers can display up to 30 decimal places.
If we see a cell values displaying ######, we need to widen the column width.
III. HOW TO ENTER DATE AND TIME IN EXCEL CELL
The Date and time data can be used for handling dates, time, or a combination of the two. Date and time data, like numeric data, is right-aligned in a cell.
We can enter dates and times in a variety of formats.
(01) Enter Date In Excel
(i) Click the cell to enter a date.
(ii) Type the day, month, and year, with each number separated by a slash (/) or a hyphen (-). We can use any of the date input formats below mentioned figure.

(iii) Press Enter key to apply the date format.
■ Note: If we enter a date as July 11 20 Excel will display it as text rather than a date because there is nothing to identify it as a date. If we place a comma after the day, Excel will be able to identify it as a date and right justify it.
(02) Enter Today’s Date in Excel
➢ Method 1: Select a cell and press Ctrl+;
➢ Method 2: Use the formula in a cell =Today()
(03) Enter Time in Excel
(i) Click the cell to enter a time.
(ii) Type the hour, a colon (:), and then type the minutes. Press the spacebar key, and type a or p for A.M. or P.M respectively.
For 24 hour format we add 12 hours for PM cases, but do not mention am or pm. For example, 17:30 indicates 5:30 PM.

(iii) Press Enter key
■ Note: When we are entering time into a cell, be sure to place a space between the time and entering AM or PM. The time should be entered as 5:30 PM rather than 5:30PM. If we make the entry without space, the time will be treated as text and it will be left-justified in the cell.
(04) Enter A Current Time in Excel
➢ Method 1: Select a cell and press Ctrl+Shift+; or Ctrl+:
➢ Method 2: This formula displays the current time as a time serial number =NOW() – TODAY()
(05) Enter Date and Time in Excel
(i) Click the cell to enter a date and time.
(ii) Type a date, press the spacebar key, and then type a time.
If required, we can change the format: Press Ctrl+1 which will open Format Cell dialog box ➪ Select Custom in Number tab ➪ Simply type in ‘Type’ box: dd-mmm-yy hh:mm am/pm.

iii) Finally, press the Enter key.
(06) Enter the Current Date and Time in Excel
➢ Method 1: Click the cell ➪ Press first Ctrl+; then press the Spacebar, then press Ctrl+Shift+; ➪ After that press Enter.
These values are entered as static values and won’t change.
➢ Method 2: Select the cell ➪ Type the formula =NOW() ➪ Press Enter.
The formula returns the dynamic result and Excel recalculates the worksheet.
(B) ENTERING DATA BY USING AUTOFILL IN EXCEL
Excel provides AutoFill options that automatically fill cells with a sequence of data (numeric value, days, month, Weekdays etc.) and/or formatting with the help of autofill handle. This tool can be used to copy text values and formulas as well.
The autofill handle is a small green square in the lower-right corner of a selected cell or range of cells. A range is a group of adjacent cells that we select to perform operations on all of the selected cells. When we refer to a range of cells, the first cell and last cell are separated by a colon (for example, A2:D10).
Steps to Start:
i) Type the first label (e.g., Date, Numeric value, Month Name, weekdays, text with a number) in the starting cell.
ii) Point to the fill handle (a small green square in the bottom-right corner of the active cell) until the pointer changes to a thin black plus sign.
iii) Drag the fill handle to the end of the range or double click on the fill handle to repeat the content in other cells. The summary of the results is shown below:

Particularly for a numeric value, if we hold down the Ctrl key and drag the Fill handle till the end of the range, vales fill with consecutive series.
■ Note: Please keep in mind that we do not double click on the fill handle to get the result because it copies the content as usual.

AutoFill handle does not only copy the same value. It fills a consecutive pattern of the series as well. So in this case, type the first two entries, select them, and then drag or double click the fill handle to expand the series using the pattern of the two selected cells.
■ Note: Remember that in this case double click on the fill handle copy the pattern.

**Tip: If accidentally Excel AutoFill handle becomes turned off, then we can turn on the AutoFill handle in the following method:
Go to File ➪ Options ➪ Advanced ➪ Select the checkbox Enable Fill Handle and cell drag-and-drop.
(C) ENTERING DATA BY USING FILL SERIES IN EXCEL
A data series is a series of numbers of items that follow a natural progression.
First, select the range along with the supplied value ➪ Then open the ‘Series’ dialog box in 2 ways:

(01) Using Excel Shortcut: Press Alt+E+I+S (sequentially press Alt, E, I, S) which will open the Series dialog box.
(02) Using the Ribbon: Go the Home tab ➪ Fill in Editing group ➪ Series which will open the Series dialog box.
The series dialog box offers the following options:
➢ Series in: Rows or Columns – Excel will guess at the correct orientation, depending upon the range selected.
➢ Type: Linear – This option is applicable for a numeric value. This option creates a straight linear progression, starting at the current value of the cell and incrementing each cell in the range by the number entered in Step Value. For example, if the first cell contains a value 1 and the step value is 5, the numbers will increment by 5s-1, 6, 11, 16, and so on.
Additionally, if we put stop value 50, it commands the Excel do not allow the values in a selected range those are more than 50.
Note: Before applying, we select the range along with the first value.
➢ Type: Growth – This option is applicable for a numeric value. This option will grow the data by the number entered in the step value box using simple multiplication. So if we start with a value of 1 and grow the data by a step value of 5, the numbers will grow as follows: 1, 1*5=5, 5*5=25, 25*5=125, 125*5=625, and so on.
Note: Before applying, we select the range along with the first value.
➢ Type: Autofill – This option is applicable for both numeric value and date. This option allows us to enter a series of numbers and Excel to determine the relationship between them in order to fill the remaining cells in the series. For example, if we place a value 1 in the first cell and a value 10 in the next cell, Excel will fill the remaining cells with 19, 28, 37, 46, 55, and so on.
Autofill will also extend a series of text when the text has a numeric component that can be incremented. For example, Tutorial-1, Tutorial-2 will be extended Tutorial-3, Tutorial-4, Tutorial-5, and so on.

Dates will also be automatically filled based upon the data originally entered in the cell. For example, if we place a date 01-Jul-20 in the first cell and date 05-Jul-20 in the next cell, Excel will fill the remaining cells with 09-Jul-20, 13-Jul-20, 17-Jul-20, 21-Jul-20, and so on.
➢Type: Date – Date allows us to enter a series of dates in a range based on Date units such as Day, Weekday, Month and Year.
For instance, if we enter 11-Jul-20 in the first cell and choose Monthly, the data series will read 11-Aug-20, 11-Sep-20, 11-Oct-20, and so on.

(D) ENTERING DATA BY USING FLASH FILL IN EXCEL
The Excel Flash Fill feature is introduced in Excel 2013. The Flash Fill feature looks for correlations between data that we enter in a column and the pattern of data entry based on the adjacent column, it fills the rest of the column to match the pattern.
➢ Using the Excel Shortcut: Press Ctrl+E
➢ Using the Ribbon: Go to the Home tab ➪ Click Fill in the Editing group ➪ Then click Flash Fill.
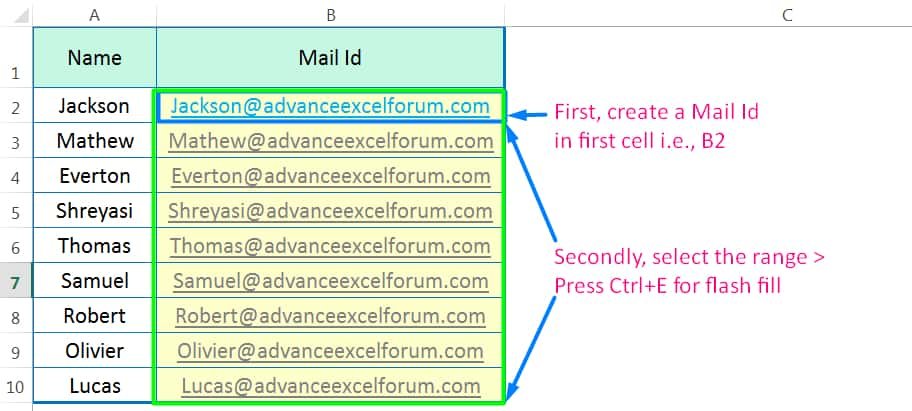
• Example 1: In the first example, create a Mail id based on the name of the adjacent column. At first, create a sample Mail id in the first cell, i.e., B2 ➪ Then select the range ➪ press Ctrl+E.
• Example 2: In the second example, we can create a Country ID in the first cell, based on County and Country Code mentioned in adjacent two columns ➪ then select the range ➪ press Ctrl+E.

• Example 3: In the third example, using Flash Fill is to divide full names in one column into separate columns of first and last names so we can reference them individually.

(E) EDITING DATA IN EXCEL
After entering data in a cell, sometimes we may need to change it.
(01) First, click the cell.
(02) We can edit the cell contents in 3 ways:
a) Edit cell contents in the formula bar.
b) Edit cell by pressing the F2 key.
c) Edit cell by double-clicking the cell.
(03) We can use Backspace or Delete to remove characters and make corrections to data entries. We can select data and type over it to replace it with new text. After editing the contents press Enter.
Note: If we’re editing cell content and decide don’t want to keep the edits, press the Esc key to return the cell to its previous state.
(04) EXPANDING THE FORMULA BAR: There are 3 ways to expand the formula bar and view the full text in it:
a) Take the cursor to the bottom edge of the formula bar, cursor change to double headed arrow and drag it down.
b) Press Ctrl+ Shift+U to toggle the height of the formula bar.
c) Click the down arrow right side the formula bar will expand and then click up arrow restores to single row-default size.
Table: Editing Keys in the Formula Bar
Keys | Functions |
| F2 | Begins editing the active cell. |
| Home | Moves the cursor to the begging of the text |
| End | Moves the cursor to the end of the text |
| Navigation keys (⬇, ⬆, ⬅, ➡) | Moves the cursor one character in the direction of the arrow |
| Ctrl+➡ | Moves the cursor one word to the right |
| Ctrl+⬅ | Moves the cursor one word to the left |
| F3 | Displays the Paste Name dialog box when we’re creating a formula |
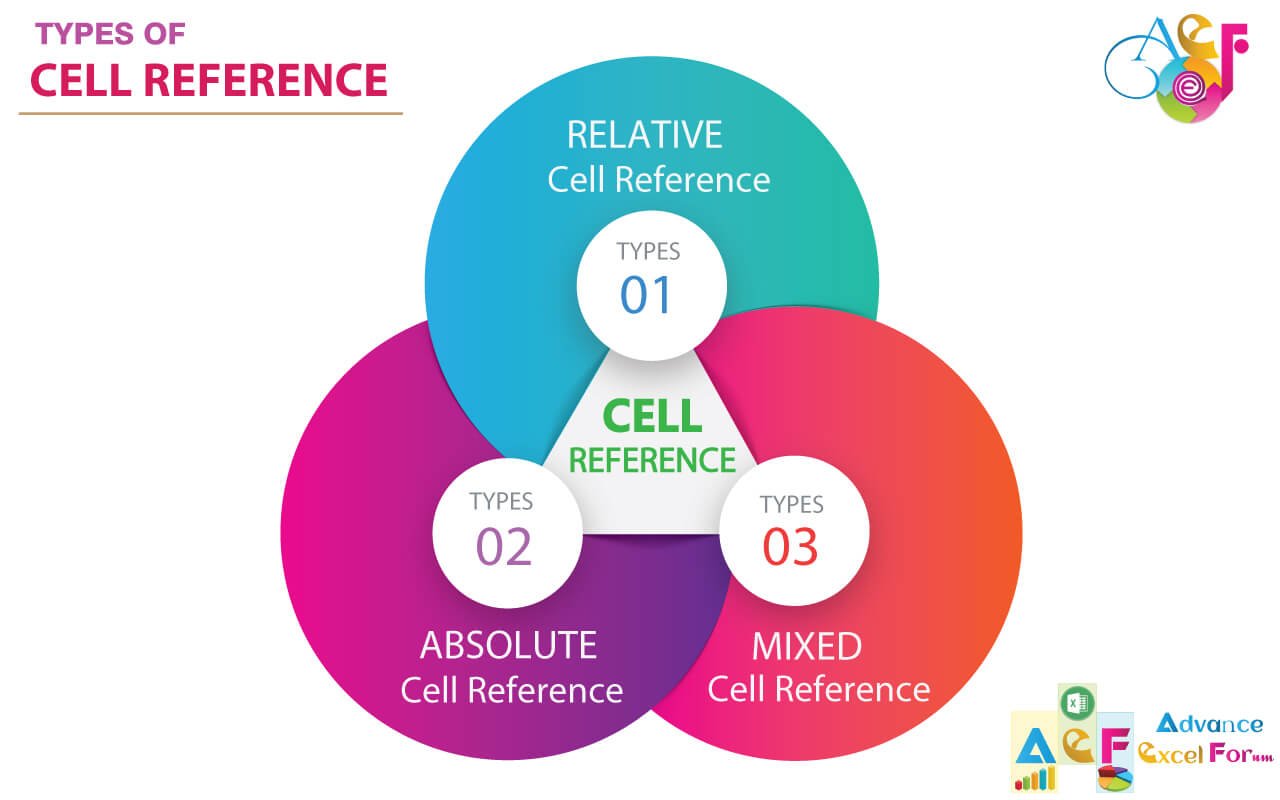
| F4 | Within the formula, cell references change from relative to absolute to mixed cell references where row being fixed to mixed cell references where column being fixed. For example, A2 ➪ $A$2 ➪ A$2 ➪ $A2. |
| Del(ete) | Deletes the character one by one to the right of the cursor. |
| Ctrl+Del(ete) | Deletes all characters from the cursor to the end of the line. |
| Backspace | Deletes the character to the left of the cursor. |
| Esc(ape) | Cancels the editing |
| Ctrl+A | Displays the Function Arguments dialog box (first type equality sign, then type a function name and then press Ctrl+A) |
(F) DELETE DATA IN EXCEL CELL / CLEAR DATA IN EXCEL CELL
(01) ENTIRE CLEAR DATA IN EXCEL CELL
We may want to clear or delete the contents in a cell if we no longer need the data in a cell.
➢ Method 1: Select the cell ➪ press Delete
➢ Method 2: Select the cell ➪ Home tab ➪ Click Clear in the Editing group
➢ Method 2: Select the cell ➪ Press Backspace ➪ Apply Enter
(02) PARTIAL CLEAR DATA IN EXCEL CELL
We may want to clear or delete a specific text or character(s) from the cell content.
➢ Method 1: Select the cell and press F2 ➪ Select the characters or text from the cell content ➪ Press Delete (Basically, the Delete button allows us to clear data rightwards).
➢ Method 2: Select the cell and press F2 ➪ Select the characters or text from the cell content ➪ Press Backspace (Basically, the Backspace button allows us to clear data leftwards).
(G) EXCEL UNDO AND REDO AN ACTION
By default, the Quick Access Toolbar contains the Save, Undo, and Redo commands.

■ Undo: Reverses the effect of the last action (Excel shortcut: Ctrl+Z).
■ Redo: Reverses the effect of the last undo (Excel shortcut: Ctrl+Y).
(H) WORK WITH EXCEL AUTOCORRECT
We can use the AutoCorrect feature to quickly correct text we commonly misspell or according to our choice. For example, if we continually misspell the word “field” as “feild”, and if we choose to change the ‘do not’ in the short form ‘don’t’, we can add the word to the AutoCorrect dictionary. The next time we mistype the word, AutoCorrect fixes the mistake as well as our choice accordingly.
We might have already noticed this feature automatically corrects the text as we type in a worksheet. AutoCorrect comes with a list of preset misspellings; however, the list is not comprehensive. To speed up text entry tasks, consider adding problem words to the list.
Click File tab ➪Click Excel Options ➪ Click Proofing ➪ Click AutoCorrect Options.

Premium Courses on ed2go
Premium Courses on Coursera
Premium Courses on Udemy

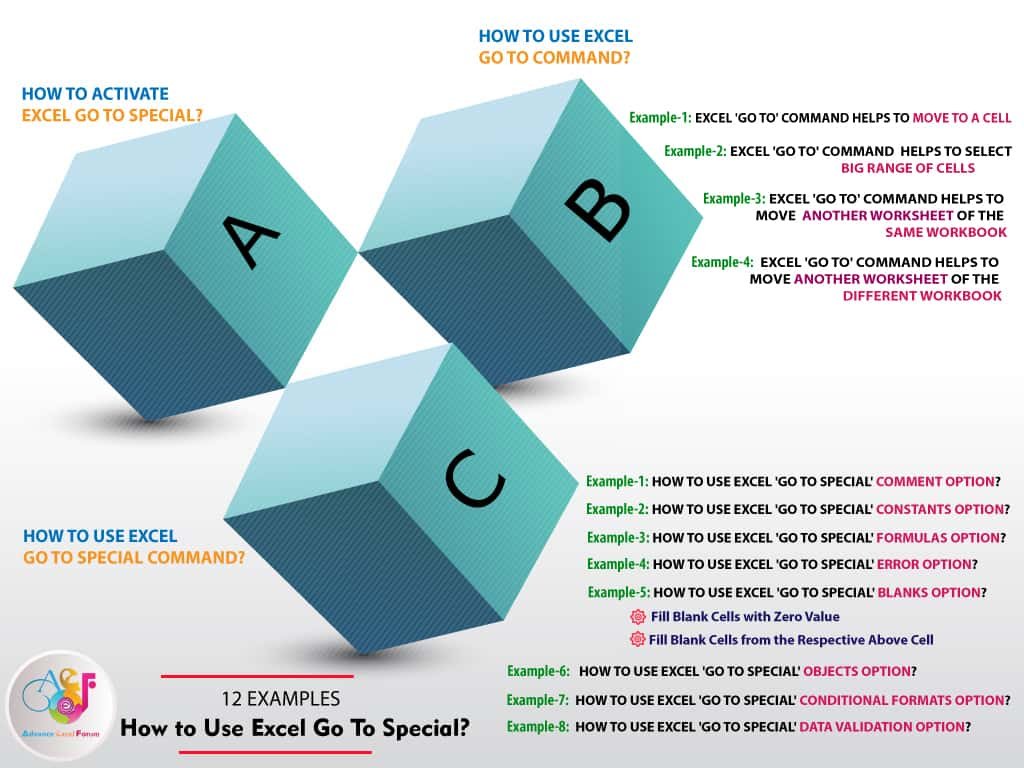
12 Examples || How to Use Excel Go To Special?
07 Points Guided You How to Find And Replace in Excel?
05 Points Should Learn How to Freeze Panes in Excel?
12 Things Guided You How to Manage An Excel Workbook
03 Useful Methods : Add Numbers With AutoSum Excel
04 Simple to Advanced Methods: How to Filter in Excel?
05 Best Ways: Create Password Protect Excel & Unprotect it
08 Best Examples: How to Use Excel Conditional Formatting?
04 BEST WAYS: HOW TO TRANSPOSE DATA IN EXCEL
Tutorial 01: How to Use Excel SUMIFS Function with Single & Multiple Criteria
Thanks for your interest joining to Advance Excel Forum community.
Something went wrong.

Join Our Community List
Subscribe to our mailing list and get interesting stuff and updates to your email inbox.
* VERIFY & CONFIRM YOUR EMAIL * We respect your privacy and take protecting it seriously*.


